We have a new home! Come join us over at http://grannyschool.blogspot.com/
See you there!

Monday, April 16, 2012


Friday, February 3, 2012
Zucchini Walnut Muffins

This is a great recipe to use up that leftover zucchini or for when you want to hide some healthy veggies in your baking!
You Will Need:
- 3 cups all-purpose flour
- 1 tsp. salt
- 1 tsp. baking soda
- 1 tsp. baking powder
- 3 tsp. ground cinnamon
- 3 eggs (use ener-g egg replacer for vegan version!)
- 1/2 cup vegetable oil
- 1/2 cup apple sauce (if you don't have apple sauce you can add an extra 1/2 cup of oil)
- 2 cups sugar (I used half brown & half white)
- 3 tsp. vanilla extract
- 2 cups grated zucchini
- 1 cup chopped walnuts
- mini chocolate chips (optional)
- 2 muffin tins & paper baking cups
Directions:
1. Preheat oven to 325 degrees & line muffin tins with paper cups.
2. Combine flour, salt, baking powder, soda, and cinnamon together in a bowl.
3. Beat eggs, oil, vanilla, and sugar together in a large bowl. Add the dry ingredients to the creamed mixture and mix well. Stir in zucchini and nuts until well combined.
4. Spoon batter into muffin cups (about 3/4 full) and sprinkle a few chocolate chips on top, if you like! Bake for about 40 minutes. Let cool & enjoy!
* Makes about 24 muffins


Tuesday, November 29, 2011
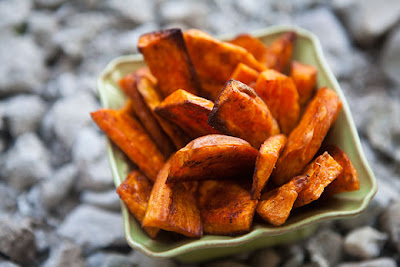
Baked Sweet Potato Fries
I am going to share with you one of my favorite and EASIEST recipes for the amount of deliciousness involved. Sweet Potato Fries! And these are baked so they are actually healthy.
(Note: Husbands & boyfriends LOVE these)

Here are your ingredients:
-Sweet Potatoes
-Olive Oil
-Garlic Powder
-Salt
-Pepper

(Note: Husbands & boyfriends LOVE these)
Here are your ingredients:
-Sweet Potatoes
-Olive Oil
-Garlic Powder
-Salt
-Pepper
Yup, that's it. Now all you gotta do is peel & chop those babies up into whatever fry-shape pleases you (I like to make mine thick like steak fries). Throw them in a bowl, toss with enough olive oil to lightly coat them, some salt, pepper & garlic powder to taste (I like a lot), and then lay them in a single layer on a baking sheet lined with parchment (you could probably skip this if you don't have any but I like it because it soaks up some of the oil and makes them crispier). Bake at 450 for about 20 mins or until golden brown. Let cool a little and enjoy!

Thursday, November 24, 2011


Wednesday, November 23, 2011
Decoration Inspiration: Holiday Mantel
To me, nothing says "holidays" more than a decorated mantel. Our current home has a really huge, prominent one that is one of the first things you see when you walk in the door, so I'm really excited to pull down all the picture frames and cover it in garlands and lights and beautiful sparkly pinecone-y things.
Here are some of my holiday mantel "inspiration pics" for this year.

I love the mint green accents incorporated throughout this one. And those three little chairs are pretty much the cutest thing I have ever seen.
I think this Holiday Mantel by Layla over at The Lettered Cottage is adorable. I especially love the vintage feel of the stockings and the suitcases in the fireplace.
Here's the full view. I love the indoor wreath.

Although I'm a big fan of stockings on the mantel, these letter-ornaments are super cute and could be hung anywhere in the house.
This year I really want to incorporate some mercury glass into my holiday decorating. I think the antiqued silver look is so beautiful and I love how you can collect a bunch of different pieces and group them together so they look cohesive. The Pottery Barn ones in this pic ain't cheap, but I've seen some great pieces at Marshalls for about a quarter of the price.
So many great ideas... And only a few more days until I can pull out the boxes! Happy Decorating.

Here are some of my holiday mantel "inspiration pics" for this year.
I love the mint green accents incorporated throughout this one. And those three little chairs are pretty much the cutest thing I have ever seen.
 |
| Via Bennet and Company |
I think this Holiday Mantel by Layla over at The Lettered Cottage is adorable. I especially love the vintage feel of the stockings and the suitcases in the fireplace.
 |
| Via The Lettered Cottage |
I love this lantern filled with fake snow nestled among the real garland with twinkle lights. Mmm, Nothing like that fresh pine-y smell! And the ornaments hanging from the twigs are adorable.
 |
| Via |
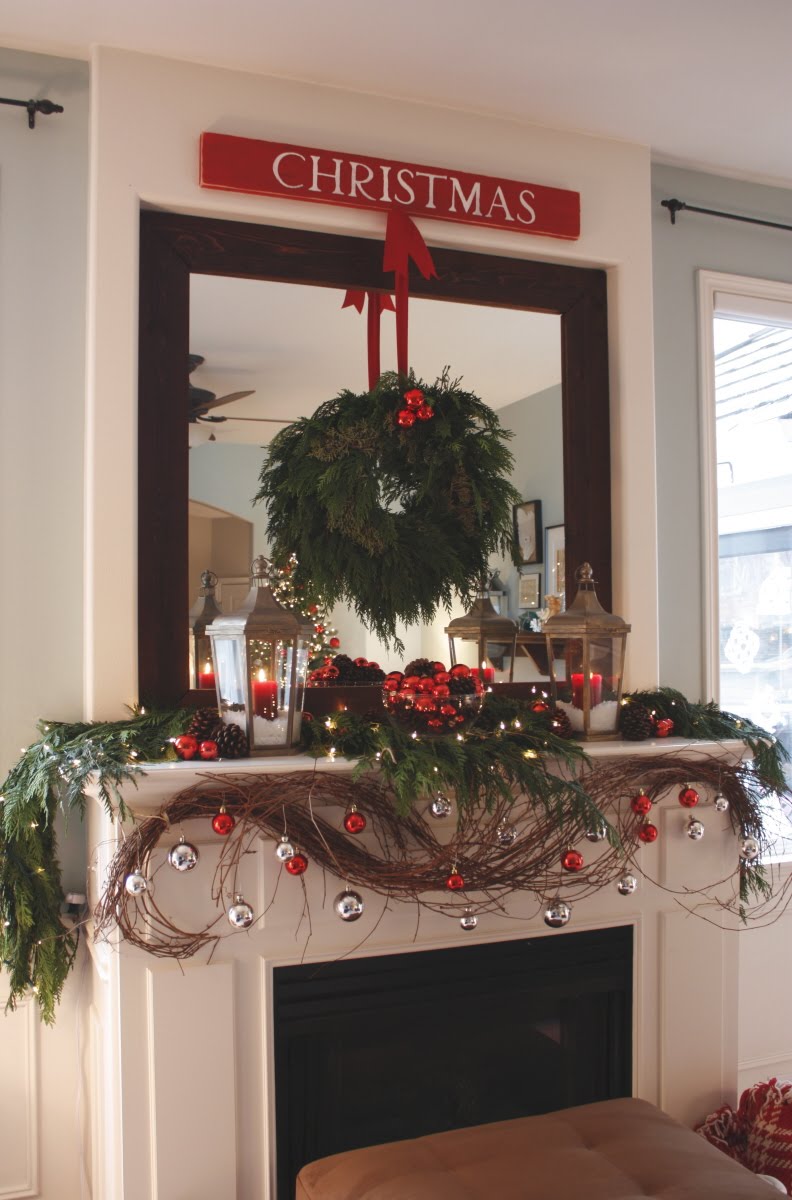
Here's a Christmas mantel with a touch of turquoise!
 |
| Via The Inspired Room |
 |
| Via HGTV |
This year I really want to incorporate some mercury glass into my holiday decorating. I think the antiqued silver look is so beautiful and I love how you can collect a bunch of different pieces and group them together so they look cohesive. The Pottery Barn ones in this pic ain't cheap, but I've seen some great pieces at Marshalls for about a quarter of the price.
 |
| Via Pottery Barn |
So many great ideas... And only a few more days until I can pull out the boxes! Happy Decorating.
Thursday, November 17, 2011
Lori's Lentil Soup
I am dedicating this recipe to my beautiful friend Lori who is a brand new mama of the most adorable baby boy. She loved the Kale & White Bean soup and requested I post a recipe for one featuring lentils. So here it is! A healthy soup, chock-full of veggies and goodness that makes great leftovers - perfect for a mama on-the-go.

You Will Need:


You Will Need:
1 onion, chopped
1/4 cup olive oil
2 carrots, diced
2 stalks celery, chopped
2 cloves garlic, minced
1 teaspoon dried oregano
1 bay leaf
1 teaspoon dried basil
1 (14.5 ounce) can of diced tomatoes
2 cups dry lentils
8 cups water (or any kind of broth)
1/2 cup spinach, rinsed and thinly sliced
2 tablespoons vinegar (balsamic tastes great!)
ground black pepper
salt
1/4 cup olive oil
2 carrots, diced
2 stalks celery, chopped
2 cloves garlic, minced
1 teaspoon dried oregano
1 bay leaf
1 teaspoon dried basil
1 (14.5 ounce) can of diced tomatoes
2 cups dry lentils
8 cups water (or any kind of broth)
1/2 cup spinach, rinsed and thinly sliced
2 tablespoons vinegar (balsamic tastes great!)
ground black pepper
salt
Directions:
In a large soup pot, heat oil over medium heat. Add onions, carrots and celery and sautée until onion is tender. Stir in garlic, bay leaf, oregano, and basil. Cook for 2 minutes.
*I should note that I am a garlic LOVER so I added 4 cloves instead of 2 and it was delicious. I also felt like my carrots were a little on the small side so I added an extra one as well as an extra celery stalk. That's the great thing about soups - you can pretty much throw in whatever you like!
Stir in lentils, and add water and tomatoes. Bring to a boil. Reduce heat and simmer for at least 1 hour. When ready to serve stir in spinach and cook until it wilts. Stir in vinegar and season to taste with salt and pepper.


P.S. I served mine with Trader Joe's Cornbread and it was AMAZING!


Sunday, November 13, 2011
Decoration Inspiration: Holiday Tablescapes
I feel like every year I end up pulling out my Christmas decorations just a little bit earlier. For the past few years my best friend and I have done "November 30th decorating day" where, even if we're not in the same city, we officially pull out our boxes of decorations and start unpacking. We had decided that December is clearly fair game for having Christmas decor up and that the last day of November would give us the best head start we could get - but this year I don't think I can wait that long. I have already visited the Ikea Holiday Tent and have amassed a little pile of new decorations that seems to be slowly increasing in size. Not to mention the fact that my new monogrammed stockings from Pottery Barn arrived and I couldn't very well put them away in a box... So this year I am officially moving decorating day to November 25th - the instant Thanksgiving is over.
To tide myself over until then I am going collect some "decoration inspiration" photos and blog about decorating different areas of your home. We shall begin with the table:

I found a plaid tablecloth this week at Marshall's and I brought it home to see if I could work it into my holiday decor. I thought it might be too busy but I think with white plates and maybe a burlap table runner and some mini pine trees it will look great.
To tide myself over until then I am going collect some "decoration inspiration" photos and blog about decorating different areas of your home. We shall begin with the table:
I found a plaid tablecloth this week at Marshall's and I brought it home to see if I could work it into my holiday decor. I thought it might be too busy but I think with white plates and maybe a burlap table runner and some mini pine trees it will look great.
 |
| Via Williams Sonoma |
Here is another great table involving plaid and some burlap. I LOVE the holly berries and the candle holders with the fake snow.
 |
| Via Sweet Something Designs |
And how cute is this place setting? I think I need to find me some burlap placemats...
 |
| Via Sweet Something Designs |
I just love how she used a blanket as a tablecloth. This is a stunning as an outdoor table and I think it would look great inside as well.
 |
| Via Sweet Something Designs |
Here's a beautiful table centerpiece that Michelle over at Sweet Something Designs created out of a pedestal bowl, a hurricane vase, and a homemade candle ring. Gorgeous! And I'm loving the bright red placemats.
 |
| Via Sweet Something Designs |
Another idea for a table centerpiece: Tiny pinecone Christmas trees! Place in little containers and add a small, glittery star on top. This would also be cute on a mantle or sideboard.
 |
| Via Good Housekeeping |
This is really pretty and simple and I love the color combo of the wintery light blue and the red. And how cute is the little robin on the table runner?
 |
| Via Honey We're Home |
And I love this take on a 'California Christmas' featuring succulents, coral and red peonies. It shows you really can incorporate anything into your holiday decor!
 |
| Via Hostess with the Mostess |
 |
| Via Hostess with the Mostess |
There are so many great ideas out there for table decor I could post pictures forever! I just hope mine turns out as beautiful as some of these. Stay tuned for the photos!

Tuesday, November 8, 2011
The Best Apple Pie

I have an announcement to make. Sunday night I made my first apple pie. From scratch. And it was the most delicious thing I have ever eaten in my whole life. I'm not kidding. And that's coming from a non-fruit-dessert-I-prefer-chocolate kind of gal. I was super nervous going into it because I really didn't want to screw it up and I'd heard pie crusts can be difficult, but the whole thing was actually not that hard at all! I find any recipe to be a little more stressful the very first time I make it because I haven't got a feel for the timing of things and this usually translates into me frantically tossing things about the kitchen and making a big mess - but after the first run-through I can see that this recipe will be fairly easy and relaxing the next time around. Not to mention it will impress the apple-bottom jeans off of anyone you happen to invite over. Seriously, it tastes INCREDIBLE.

First things first we are going to make the pie crust.
You will need:
1 1/4 cups all purpose flour
1/4 teaspoon salt
1/2 cup butter, chilled & diced
1/4 cup of ice water
This recipe is enough for one pie crust which would be great for a pumpkin or pecan or some other open-faced pie, but because we are making an apple pie it needs a top - so double it. I chose to make a lattice-top pie and found that even with doubling this recipe I was running out of dough by the end so when I make it again I will probably triple it. You may have some dough left over but it's better than not having enough.
If you have a food processor, use it. I used mine & it turned out great. If not, a large bowl will be fine along with a pastry blender to cut in the butter (if you don't have this apparently you can use two knives or a fork although I'm not sure exactly how this works. For some tips on "cutting in butter" check out this blog post).
Directions:

In a large bowl (or food processor) combine flour & salt. Cut in butter until mixture resembles coarse crumbs. (If using food processor press "pulse" button until you reach the desired consistency). You want to make sure your butter is SUPER cold before this step. I chopped mine into small-ish pieces and put it in the freezer for a few minutes before adding it to the dry mixture. The key is to keep the butter from melting so that when you cut it in it stays in tiny hard pieces which will create that delicious flakiness in your pie crust.

Now stir in your ice water (again, keeping everything cold) a tablespoon at a time just until the mixture starts to come together. Test your dough - when you can form it into a ball without it falling apart it's done. You may not need all the water, you may need a little extra - this is one of those baking things where you just have to play it by ear. Now take your dough out and lightly form it into 2 separate balls (this is assuming you doubled the recipe - if not just form it into one & repeat the recipe) wrap in plastic wrap and refrigerate. A lot of pie crust recipes ask you to refrigerate the dough for 4 hours or overnight, but I just left mine in there while I prepared the pie filling and it turned out great. So make it in advance if you want - or just leave it in there until we finish the next part!
Apple Pie Filling
You will need:
1/2 cup unsalted butter
3 tablespoons all-purpose flour
1/4 cup water
1/2 cup white sugar
1/2 cup packed brown sugar
1 tablespoon vanilla
1 teaspoon cinnamon
8 Granny Smith apples - peeled, cored & sliced
*Pre-heat your oven to 425 degrees F
First things first. You are only going to need 8 apples if your apples are the size of plums. I went ahead and chopped up 8 giant-sized apples and ended up with a TON left over. So I would say you are going to need about 5. I wanted to write the recipe as-is just in case you are one of those people working with mini-apples but, as you can see in the picture below, mine were big. (*note: I didn't use the red apples, they just looked cute in the picture).

Peel them, core them, and slice them into thin (but not paper thin) slices. Set aside in bowl.

Now at this point I would take my pie dough out of the fridge and prepare the crust, as the next step involves boiling butter and sugar and once it's done you want to be ready to pour it into your pie.
So take one lump of your dough out of the fridge and using a rolling pin roll it out on a lightly floured surface until it's large enough to fit your 9" pie dish. Place into pie dish and carefully press the dough evenly into the bottom and sides. Set aside.
Now melt your butter in a saucepan (low to medium heat to avoid burning). Stir in the flour to form a paste. Add the water, white sugar, brown sugar, vanilla & cinnamon and bring to a boil. Reduce temperature & let simmer.

While this is simmering (on low heat) take your pie crust & fill it with the sliced apples. The apples will shrink down a bit when cooked so use enough apples to create a bit of a mound.

Now take your butter/sugar mixture and carefully pour it over the apples. I saved about a third of my butter & sugar mixture and poured it over the finished top-crust so that when it baked it created this crispy, caramelized layer that was DELICIOUS! But it's up to you - you can use it all now if you like. (If you want to save some make sure you leave it on the stove on a super low heat so it doesn't harden).
Next you will be creating the top crust of your pie. There are several ways to do this, but I wanted to make a lattice crust for mine so I bought a pastry wheel which is how you get those cute little zig-zaggy edges on your dough strips. So basically you roll out your 2nd lump of dough (the one that's still waiting in the fridge) on a lightly floured surface until it's fairly thin. Then you using your pastry cutter you cut it into strips and lay them across the top of your pie. (I forgot to take a picture of this step so I borrowed one from the Williams Sonoma website).

There are a few ways you can lay the strips. I watched this YouTube video and followed their instructions.
When you're done, take the remainder of your butter & sugar mixture and gently pour or brush it over the crust.

Bake for 15 minutes in your preheated oven. Then reduce the temperature to 350 degrees and continue baking for 35-45 minutes until the apples are soft.
Remove from oven, let cool for 10-15 minutes. Serve & enjoy!


“Come join Love the Pie with TidyMom sponsored by Cherokee USA, Le Creuset, Wilton, Bags by Bloom and Harvard Common Press”

Subscribe to:
Posts (Atom)